


How to Remove Radio Rust Without Losing Its History

A light bloom of rust on an antique radio chassis can look alarming, especially when the set has been in a basement, barn, attic, or inherited from a family home. Yet learning how to remove radio rust is less about making every surface look new and more about stopping active corrosion while preserving the evidence of a radio’s long life. The goal is careful stabilization, not an over-restored finish that erases its character.
Rust removal also requires restraint because a vintage radio is not one material. Its painted steel chassis, plated dial escutcheon, brass hardware, aluminum shields, cloth-covered wiring, paper labels, and delicate coils all respond differently to cleaning methods. What works well on a rusty steel screw can permanently damage a nickel-plated control shaft or a 1930s paper identification label.
First, Decide Whether the Rust Is Active
Not every brown mark requires treatment. A dark, stable discoloration on a chassis may be old oxidation that has not changed in decades. Active rust is usually powdery, flaky, orange-brown, or lifting the surrounding paint. It can spread under a chassis coating, seize fasteners, weaken brackets, and create poor electrical connections at grounding points.
Before touching the set, photograph it from several angles. Take close-up images of labels, tube locations, wiring routes, dial components, and any unusual hardware. These photographs preserve a record of the radio as found and can be invaluable if a part must be removed later.
A radio with extensive rust often tells a larger story about its storage conditions. If the chassis is heavily corroded, inspect the cabinet bottom, speaker frame, transformer laminations, tuning capacitor, and screws beneath the dial. Water exposure may have affected far more than the visible top surface.
Make the Radio Safe Before Cleaning
Never clean a vintage radio while it is plugged in. Unplug it, remove the batteries if it is a battery set, and allow it to sit before beginning work. Tube radios contain capacitors that can retain a hazardous electrical charge even after the cord has been removed. If you are not experienced working around high-voltage electronics, do not reach beneath the chassis or attempt to discharge components yourself.
Work in a dry, well-lit area with good ventilation. A soft towel or padded mat will protect the cabinet from scratches, while a small tray or labeled containers will keep removed screws and knobs together. Wear nitrile gloves when using cleaners, and use eye protection when brushing or polishing loose corrosion.
Avoid spraying any cleaner directly into the radio. Liquids can travel into coils, transformer windings, switches, dial mechanisms, and paper capacitors, where they create problems that are much harder to correct than surface rust.
How to Remove Radio Rust From a Steel Chassis
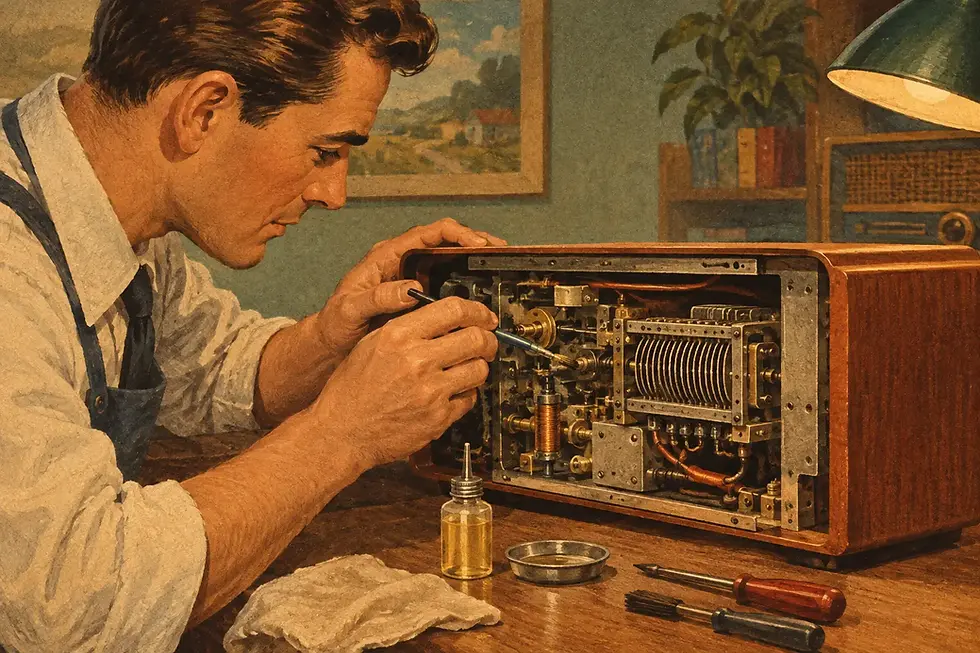
For light surface rust on an unpainted steel chassis, begin with the least aggressive approach. Use a soft natural-bristle brush or a dry paintbrush to remove dust and loose flakes. A small vacuum held nearby can capture debris, but keep the nozzle away from fragile wires, dial cords, and components.
Next, test a tiny inconspicuous area with a cotton swab lightly dampened with a gentle metal-cleaning oil. The swab should be damp, not dripping. Let the oil loosen the oxidation for a few minutes, then rub gently with a soft cloth or very fine synthetic abrasive pad. Work slowly and stop often to inspect the surface.
For isolated spots that remain, a small piece of very fine steel wool can be used with great caution on bare steel only. Keep it away from coils, tuning capacitors, switches, and open electrical assemblies. Steel wool fibers can lodge in these areas and create shorts or mechanical trouble. Many restorers prefer fine brass wool or a synthetic pad because it does not leave conductive fragments behind.
Wipe away residue with a clean cloth, then apply a very thin protective film of museum-safe wax or light preservative oil to bare metal. The coating should be nearly invisible. A chassis should not look wet, glossy, or freshly painted unless repainting is truly necessary and historically appropriate.
Do Not Sand a Chassis to Bright Metal
Coarse sandpaper, wire wheels, drill attachments, and aggressive rust-removal discs can remove original plating, stamped markings, paint, and metal in seconds. They also leave a surface that looks unmistakably modern. An antique radio chassis was never intended to resemble polished stainless steel.
If corrosion has penetrated deeply enough to leave pitting, accept that some pitting may remain. Stabilized pitting is generally preferable to a thinned chassis, erased lettering, or a finish that no longer suits the radio’s age.
Treat Plated, Brass, and Aluminum Parts Differently
A radio’s decorative parts deserve special attention. Dial bezels, escutcheons, knobs, grille trim, and handle hardware may be nickel plated, chrome plated, brass, pot metal, or aluminum. Their condition can strongly affect the set’s appearance and value.
Nickel and chrome plating are thin. If the surface looks rusty, the rust may actually be coming through damaged plating from the steel underneath. Heavy polishing will not repair this condition. It can remove more of the remaining plating and expose a larger dull area. Clean gently with a soft cloth and a mild polish made for plated surfaces, testing first in a hidden area.
Brass can often tolerate a little more polishing, but the original patina is part of its appeal. Remove green corrosion or active residue carefully, then leave a soft, aged tone rather than polishing the part to a mirror finish. Aluminum must never be treated with steel wool or harsh alkaline cleaners, which can leave dark scratches and blotches.
Pot metal, common in some 1930s radio trim, is especially unpredictable. It may swell, crack, or crumble with age. Do not soak it, bend it, or force it apart. A fragile escutcheon is usually better handled by a specialist who can determine whether it can be stabilized or reproduced without risking the original.
Keep Rust Treatments Away From Sensitive Components
Chemical rust converters and removers have a place in general metal restoration, but they are rarely a first choice inside antique electronics. Acid-based products can wick into seams, attack nearby finishes, and leave residues that continue reacting. They can also damage zinc plating, aluminum, brass, cloth insulation, labels, and wood if used carelessly.
The same caution applies to household products. Vinegar, lemon juice, cola, and abrasive kitchen cleaners may seem convenient, but they are difficult to control around a populated radio chassis. Their low cost is not worth the risk to a rare transformer, an original dial scale, or wiring that cannot be replaced without changing the radio’s character.
When a rusty screw must come out, place a tiny amount of penetrating oil on the threads with a toothpick or precision applicator. Allow time for it to work. Use a correctly sized screwdriver, support the surrounding metal, and never force a frozen fastener. Replacing a screw is easy. Repairing a broken mounting tab or stripped tuning capacitor frame is not.
When Rust Has Reached the Electronics
Rust on a chassis is often cosmetic. Rust on a transformer, speaker frame, tube socket contacts, tuning capacitor bearings, or control shafts can affect performance. A corroded tube socket may cause crackling or intermittent operation. A seized tuning capacitor can damage delicate plates. Rusted transformer laminations may be manageable, but moisture inside the transformer is a much more serious concern.
Do not power a radio simply to see whether it still works after it has been stored in damp conditions. Old capacitors can fail, and compromised insulation or a damaged transformer can create a safety hazard. Electrical restoration should come before regular listening, even if the set lights up and receives a station.
For heirloom consoles, cathedral radios, tombstone sets, Art Deco models, Catalin radios, and early battery sets, the right choice may be professional assessment rather than further cleaning. These pieces can have construction details and original finishes that are easily disturbed by well-meant work.
Preserve the Finish, Then Control the Environment
Once active rust has been reduced and the radio is dry, its future storage matters more than any single cleaning product. Keep the set in a climate-controlled interior space, away from damp basements, garages, exterior walls, and direct sunlight. Avoid plastic bags, which can trap moisture. A breathable cotton cover is a better choice for a radio displayed or stored for long periods.
Check the set periodically for new orange dust, damp odors, lifting paint, or corrosion around screws and control shafts. Early attention is gentle attention. A small spot addressed now may never become the kind of damage that requires refinishing, parts fabrication, or extensive chassis work.
A vintage radio does not need to look untouched by time to be beautifully preserved. It needs patient care, safe electrical restoration, and a hand that recognizes the difference between honest age and ongoing damage. For pieces that carry a family story or deserve careful technical attention, Regal Sound Design approaches that balance as stewardship: preserving the radio’s history while helping the sounds of yesterday return safely to life.

Comments