


How to Clean Antique Radio Dials Without Damage

A radio can arrive on the bench with a silent chassis, a cracked power cord, and years of dust inside the cabinet, yet the dial is often what catches the eye first. Learning to clean antique radio dials carefully is not a cosmetic afterthought. It is part of preserving the face of a family heirloom, a rare console, or a tabletop set that has carried its history for generations.
The challenge is that old radio dials are rarely as durable as they appear. Some are glass with lettering printed on the back. Others are thin celluloid, early plastics, painted metal, or translucent film. A cloth that seems harmless, or a household cleaner used for only a moment, can remove station markings, haze a plastic window, or leave permanent streaks across a dial that cannot be replaced.
Why Antique Radio Dials Need a Gentle Approach
From the 1920s through the 1960s, manufacturers used many materials and printing methods. A large multiband dial on a console may have delicate reverse-painted graphics behind a glass panel. A compact Bakelite radio may use a clear plastic dial cover with silk-screened lettering. Art Deco sets can have gold accents, painted trim, and fine lines that are especially vulnerable to moisture and friction.
Age changes the equation. Heat, sunlight, cigarette smoke, household oils, and moisture can weaken inks and coatings. The dial may look intact until cleaning begins. Then a familiar station scale, a manufacturer logo, or a colored band can lift away with the first pass of a damp cloth.
For that reason, preservation comes before brightness. A little honest yellowing or a few small spots may be preferable to a dial that looks cleaner but has lost its original markings. The goal is to remove loose dirt and distracting residue while keeping original materials and details intact.
Identify What You Are Cleaning First
Before using any cleaner, inspect the dial under good indirect light. Look for scratches, flaking print, cloudy areas, cracks, warping, and places where the lettering appears raised or unstable. Check both sides if the dial can be viewed safely. Printing on the back side of glass is common, and that side is often the more fragile one.
Do not assume a transparent surface is glass. Early plastic windows and celluloid dials can look remarkably similar to glass, particularly after decades of dust. Plastic can craze or become cloudy when exposed to alcohol, ammonia, or solvent-based cleaners. Celluloid may be brittle, shrunken, or beginning to deteriorate, which calls for even more restraint.
Also notice what surrounds the dial. The pointer, dial cord, pulleys, felt seals, metal escutcheon, and veneer cabinet all have different needs. A liquid that runs behind the dial can stain the cabinet, corrode hardware, or wick into the dial cord. If there is any uncertainty about material or print stability, stop at dry cleaning until a qualified restoration technician can examine it.
How to Clean Antique Radio Dials Safely
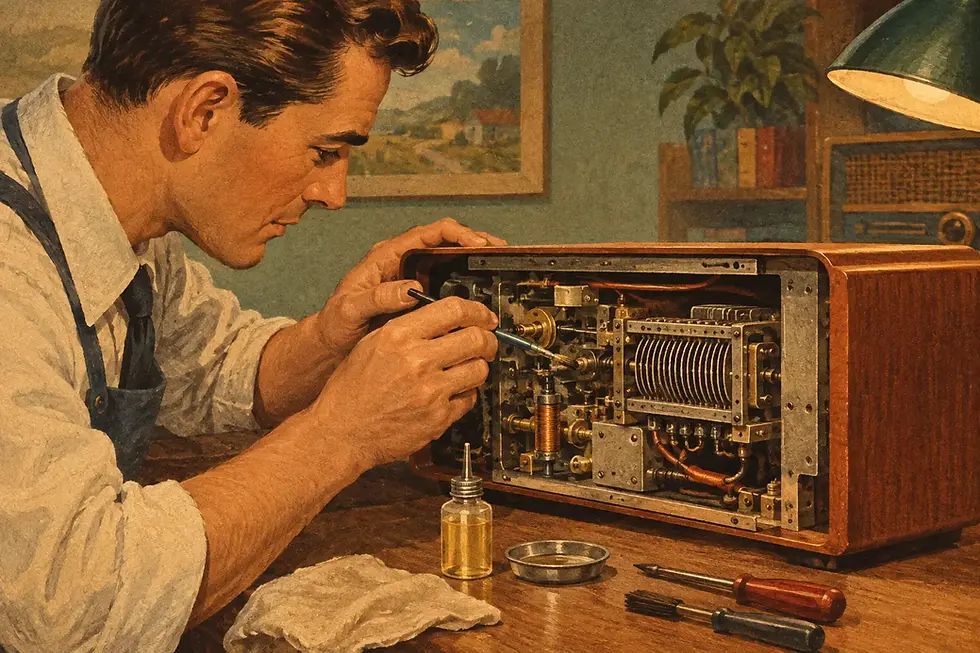
Begin with the least aggressive method: dry dust removal. Unplug the radio and keep it disconnected throughout the process. If the dial is accessible without disturbing the chassis, use a soft natural-hair artist brush or a clean, very soft detailing brush to lift loose dust. Work gently from the top down, keeping pressure off the dial face and avoiding the pointer.
A hand-held bulb blower can help move dust from corners and around the dial scale. Avoid canned air. Its force can damage fragile parts, and the propellant may leave residue or cause a sudden cold shock on old plastic. A vacuum can also be risky near loose labels, brittle wiring, and dial cords unless it is used at a distance with very low suction.
If dry brushing is not enough, test before proceeding. Choose a hidden edge or a small area without lettering. Dampen, do not soak, the corner of a white cotton swab with distilled water. Touch it lightly to the surface once. If color transfers to the swab, if the finish becomes tacky, or if the surface changes appearance, do not use moisture on that dial.
When the test is successful and the dial surface is stable, use a barely damp microfiber cloth or cotton swab to address small areas of grime. Roll the swab across the surface rather than scrubbing back and forth. Change swabs often so removed soil is not dragged over the lettering. Keep moisture away from dial edges, screw holes, and the spaces around the pointer.
For a plain, unprinted glass front surface, a small amount of distilled water is usually the safest starting point. Clean only the glass side that has no paint or graphics. Dry it immediately with a separate soft cloth. Even then, avoid flooding the area. A radio dial is not a modern window, and liquid should never be allowed to run into the cabinet.
What Not to Use on Vintage Dial Faces
Household glass cleaners, ammonia, rubbing alcohol, acetone, lacquer thinner, and adhesive removers do not belong near most antique radio dials. They can dissolve or soften printed markings, damage clear coatings, and haze early plastics. Paper towels are also a poor choice because their fibers can scratch plastic and catch on flaking paint.
Polishes and scratch removers deserve caution as well. They may improve a plain plastic cover, but they remove a small amount of material in the process. On a thin, warped, crazed, or printed dial cover, that trade-off is often unacceptable. Never polish a dial face until you know exactly what it is made of and where its lettering sits.
Cleaning the Parts Around the Dial
The dial pointer and escutcheon often collect grime that makes the entire tuning area look dull. A soft brush is usually enough for the pointer. Do not bend it to gain access, especially on sets with delicate mechanisms. Re-aligning a pointer may require removing the chassis, restringing a dial cord, or recalibrating the tuning system.
Knobs can sometimes be removed and cleaned separately, but only after documenting their original positions. Take clear photographs before lifting any knob. Some are held by set screws, while others pull straight off. Old plastics can crack when forced, and painted or plated knob inserts may not tolerate soaking.
The dial cord deserves particular respect. It is often cotton or braided material that has survived for many decades under tension. Keep cleaners, oils, and water away from it. If the cord slips, frays, or breaks, the radio may require restringing based on its original routing. That work is precise and can be frustrating even for experienced hobbyists.
When Patina Should Remain
Not every mark is dirt. A faint amber cast in a dial window may be the natural aging of plastic. Slight fading in a station scale may reflect the radio's years in sunlight. On a scarce cathedral, tombstone, Catalin, or early battery set, removing that evidence of age can diminish authenticity more than it improves appearance.
This is where a restoration-minded approach matters. A well-preserved dial should look cared for, not newly manufactured. The best result often leaves a small amount of age visible while restoring legibility and allowing the cabinet and dial lighting to present the radio as it was meant to be seen.
When to Leave Dial Cleaning to a Specialist
Professional help is wise when lettering is flaking, the dial is cracked or warped, the surface has sticky residue, or cleaning requires chassis removal. It is also the safer choice when a radio uses multiple layers of glass, fragile translucent film, complicated push-button tuning, or a dial cord that is already slipping.
A specialist can evaluate the dial alongside the radio's electrical condition. Old capacitors, deteriorated insulation, and unsafe power components may need attention before the set is operated. Cleaning the face is satisfying, but hearing a restored tube radio receive a station clearly and safely is what brings the piece fully back into the room.
A careful hand can remove decades of dust. Knowing when to stop protects the dial's original voice, its maker's details, and the memories that made the radio worth saving in the first place.


Comments